Are you thinking of getting a solar panel? If yes, then you are in the right place. Installing the solar panel is an easy task. And it becomes easier when you follow a proper guideline. You can complete the whole installation on your own if you follow a step-by-step way.
Considering all the struggles you might go through to install the solar panel, we have brought today’s article about the Solar panel installation guide. Here, we will share a detailed guideline for you to complete the installation process in an easy way and therefore share additional things to consider.
So without any further ado, let’s get started with the procedure!
Things To Do Before Installing The Solar Panel
Before you start with the installation procedure, you need to consider a few factors. Let’s have a glimpse at those:
- As the only place where you will install your solar panel is the roof, you must notice if there is any damage there and try to repair those damages.
- Do not attempt to install your solar panel in an area where there are big trees. The shading will make your solar panel less functional.
- The shape of your roof needs to be taken into consideration once you decide to install the solar panel. Afterward, bring a solar panel and fix the area according to the measurement.
- The water passing system is a big concern for your solar panel. If you do not consider the water passway of your roof, then after rain the water may damage the solar panel. That’s why repairing the drainage system is important before installing the solar panel.
- You have to be cautious about how you will deal with natural calamities like thunder, rain, snowfall, storm, etc. Unless you build enough protection for your solar panel, installing it will be a foolish act to do.
Solar Panel Installation Guide | Step By Step
Now we will share the step-by-step procedure for you to install your solar panels. Let’s get started!
Step-1: Installing the mount
The mount is the first thing that you need to fix while you want to install the solar panel. You will receive three types of mounts with your solar panel. There can be either Roof-ground mounts, Flush mounts, or flush mounts.
As your solar panel will remain on the mounts, the mount installation needs to be strong and sturdy. Otherwise, your solar panel will fall. Depending on the country you live in, you have to install the mounts where there will be enough sunlight. While installing the mount, slightly tilt it for 18 to 36 Degree to get the best sunlight. That’s why you will notice the solar panels are slightly angled.
Step-2: Installing the solar panels
Now that you are done with your mounts installation, it’s time to install the solar panels. In this step, you have to secure the solar panels with the mounting structure. Notice all the nuts and bolts and secure those in their certain place as well. Do this whole process with plenty of time and care. Because this step ensures if your solar panel is going to be long-lasting or not.
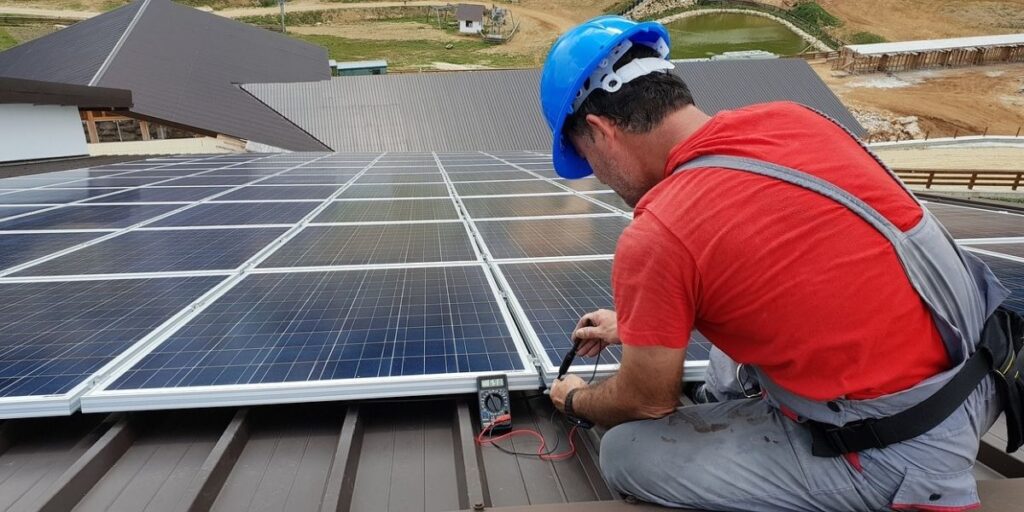
Step-3: Electrical Wiring
Without the wiring, your solar panel won’t receive power. For doing this step you will need a universal connector. Universal connectors can be used with all kinds of solar panels, you should get one of them for your comfortable electrical wiring. You can do the electrical wiring in two ways. Either Series Connection or Parallel connection. The choice is yours.
Step-4: Connecting the whole system with the solar inverter
For completing step 4 you have to connect the system with the solar inverter. You have to connect the positive portion of the wire to the positive terminal of the solar inverter. Then, you have to connect the negative portion of the wire to the negative terminal of the inverter. Any mismatch in this area can result in a short circuit so be very careful.
Step-5: Connecting the solar battery and solar inverter
Now as you have finished connecting the whole system with the solar inverter, you have to connect the inverter with a battery for power. Again you have to make the connection between the positive portion of the inverter with the positive signed area of the battery. Then, in the same way, connect the negative side of the battery to the negative portion of the inverter.
Step-6: Establishing the connection between solar inverter and the grid
Now you have to establish the connection between the solar inverter and the grid. You will need a plug for connecting to the main power switchboard of your house from where you will get the main electricity.
Final step: Starting the Inverter
After being done with all the connecting and wiring, it is time to start the inverter. By switching on your home’s main power switch, your solar panels will start working. And thus you are done with installing the solar panel. So easy, right?
Read next: Solar Panel Installation Mistakes
Frequently asked questions (FAQ)
Where to install solar panels?
The solar panels should be placed in a place where the sunlight gets to reach the panels the most. For example, the best place to install solar panels is the roof. But, you have to look for another place if the roof does not get the sunlight properly.
Can I install my own solar panels?
The answer is yes. All you have to do is drive the lag bolts and fix the parts of the panels properly. For that, you might need to spend a day or two in the place where you are willing to install the solar panels. If you are ready to do these, then you can install your solar panels all on your own.
Is it hard to install solar panels?
As you can install your solar panels all by yourself, it isn’t that much hard to install them. But you should be very careful about installing solar panels because even a single mistake can cause a big mess. So, although it isn’t hard to install solar panels, you should be cautious.
How long does it take to install solar panels?
Although the duration depends on the number of panels that are going to be installed, it usually takes one to three days for the standard solar panels.
Are there any types of solar panels?
Yes, there are three types of them. The three types of solar panels are called monocrystalline, polycrystalline, and thin-film. All the types have their specifications which are considered to select a suitable place to install.
Wrapping up
Here ends our Solar panel installation guidewith everything that you need to know. We have covered the whole process in our steps so there is nothing left out. You can read the process again and then proceed with your work. Hopefully, the procedure seems to be like a piece of cake to you now.
Do not forget to recheck the bolts and nuts and secure those properly. Also, make sure to gather enough protection for your solar panel so that natural disasters don’t damage it. Besides, set the mount considering the sun position in your country. That’s all you need to know to get great renewable energy. Good luck!